

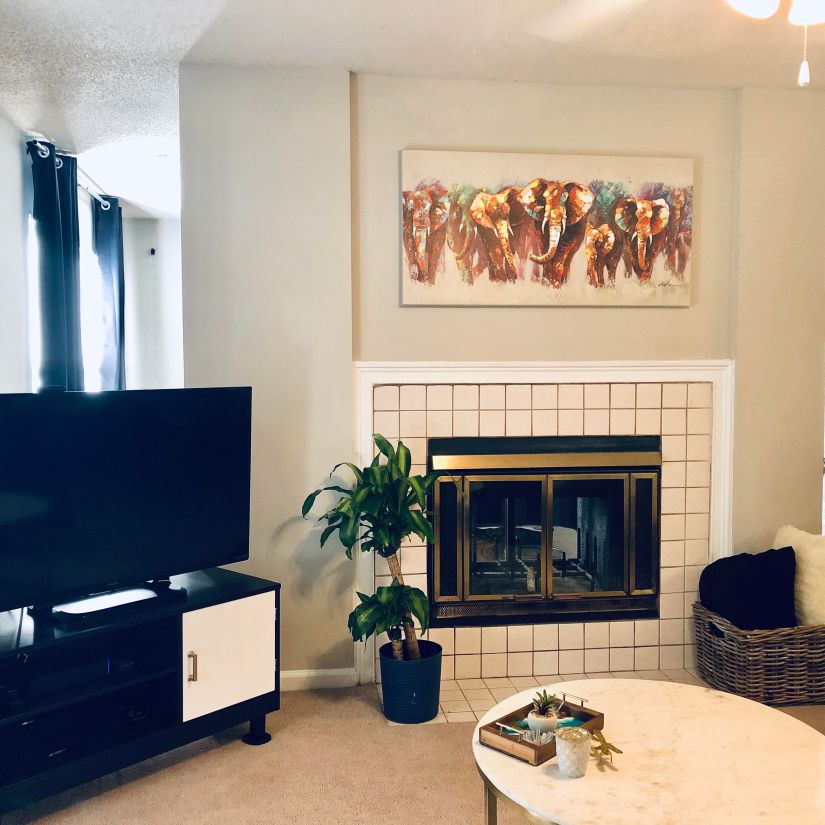
Design can take on many shapes and sizes and many of you know how passionate I am about every aspect.
Putting together my living room was incredibly rewarding and the additions I got to make the room perfect only came out to $70.
But, today I want to focus on sharing the awesome step by step process for making my TV cabinet.
I was leaning towards a mid-century modern look to really add some character into the space. I picked out roughly 4 options on Amazon that had the look and feel I was going for, but they ranged in price from $80 – $150 and most had iffy reviews.
The biggest deterrent was that many of the reviews talked about assembly issues, damaged parts, and difficulty with customer service because the items weren’t fulfilled through Amazon.
And so, I sent off the options to a good friend and decided to browse Facebook marketplace while I waited for a response…
And I stumbled across this:
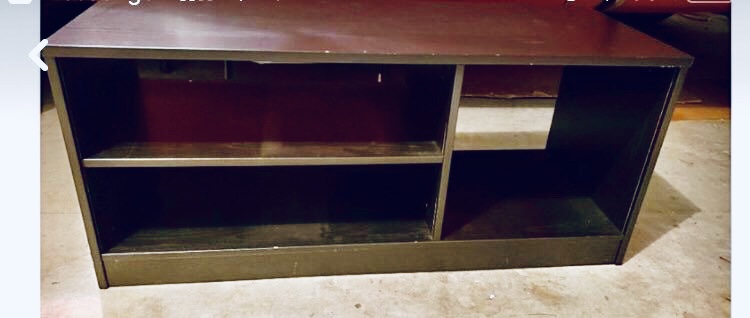
It was described as being a little flimsy, and needed some touch ups on the finish, but it was listed for $10.
First things first, I had to call my dad to make sure he had the right tools to make this project piece come to life.
Step One: Reinforce the Back

We bought a piece of medium density fiberboard that we could cut down to size.
Since the piece was not very sturdy, this backing provides the added support, keeps the unit together and allows it to hold more weight. My TV is slightly larger than this stand was intended for and the previous owner had just used it as shelves, not to hold much weight.
We used a triangle and clamp to make the unit square before drawing out the outline of where to cut the board.
After cutting the board, it was nailed into place. Thank god my dad is good with a nail gun because I am not.
Step Two: Attach The Legs

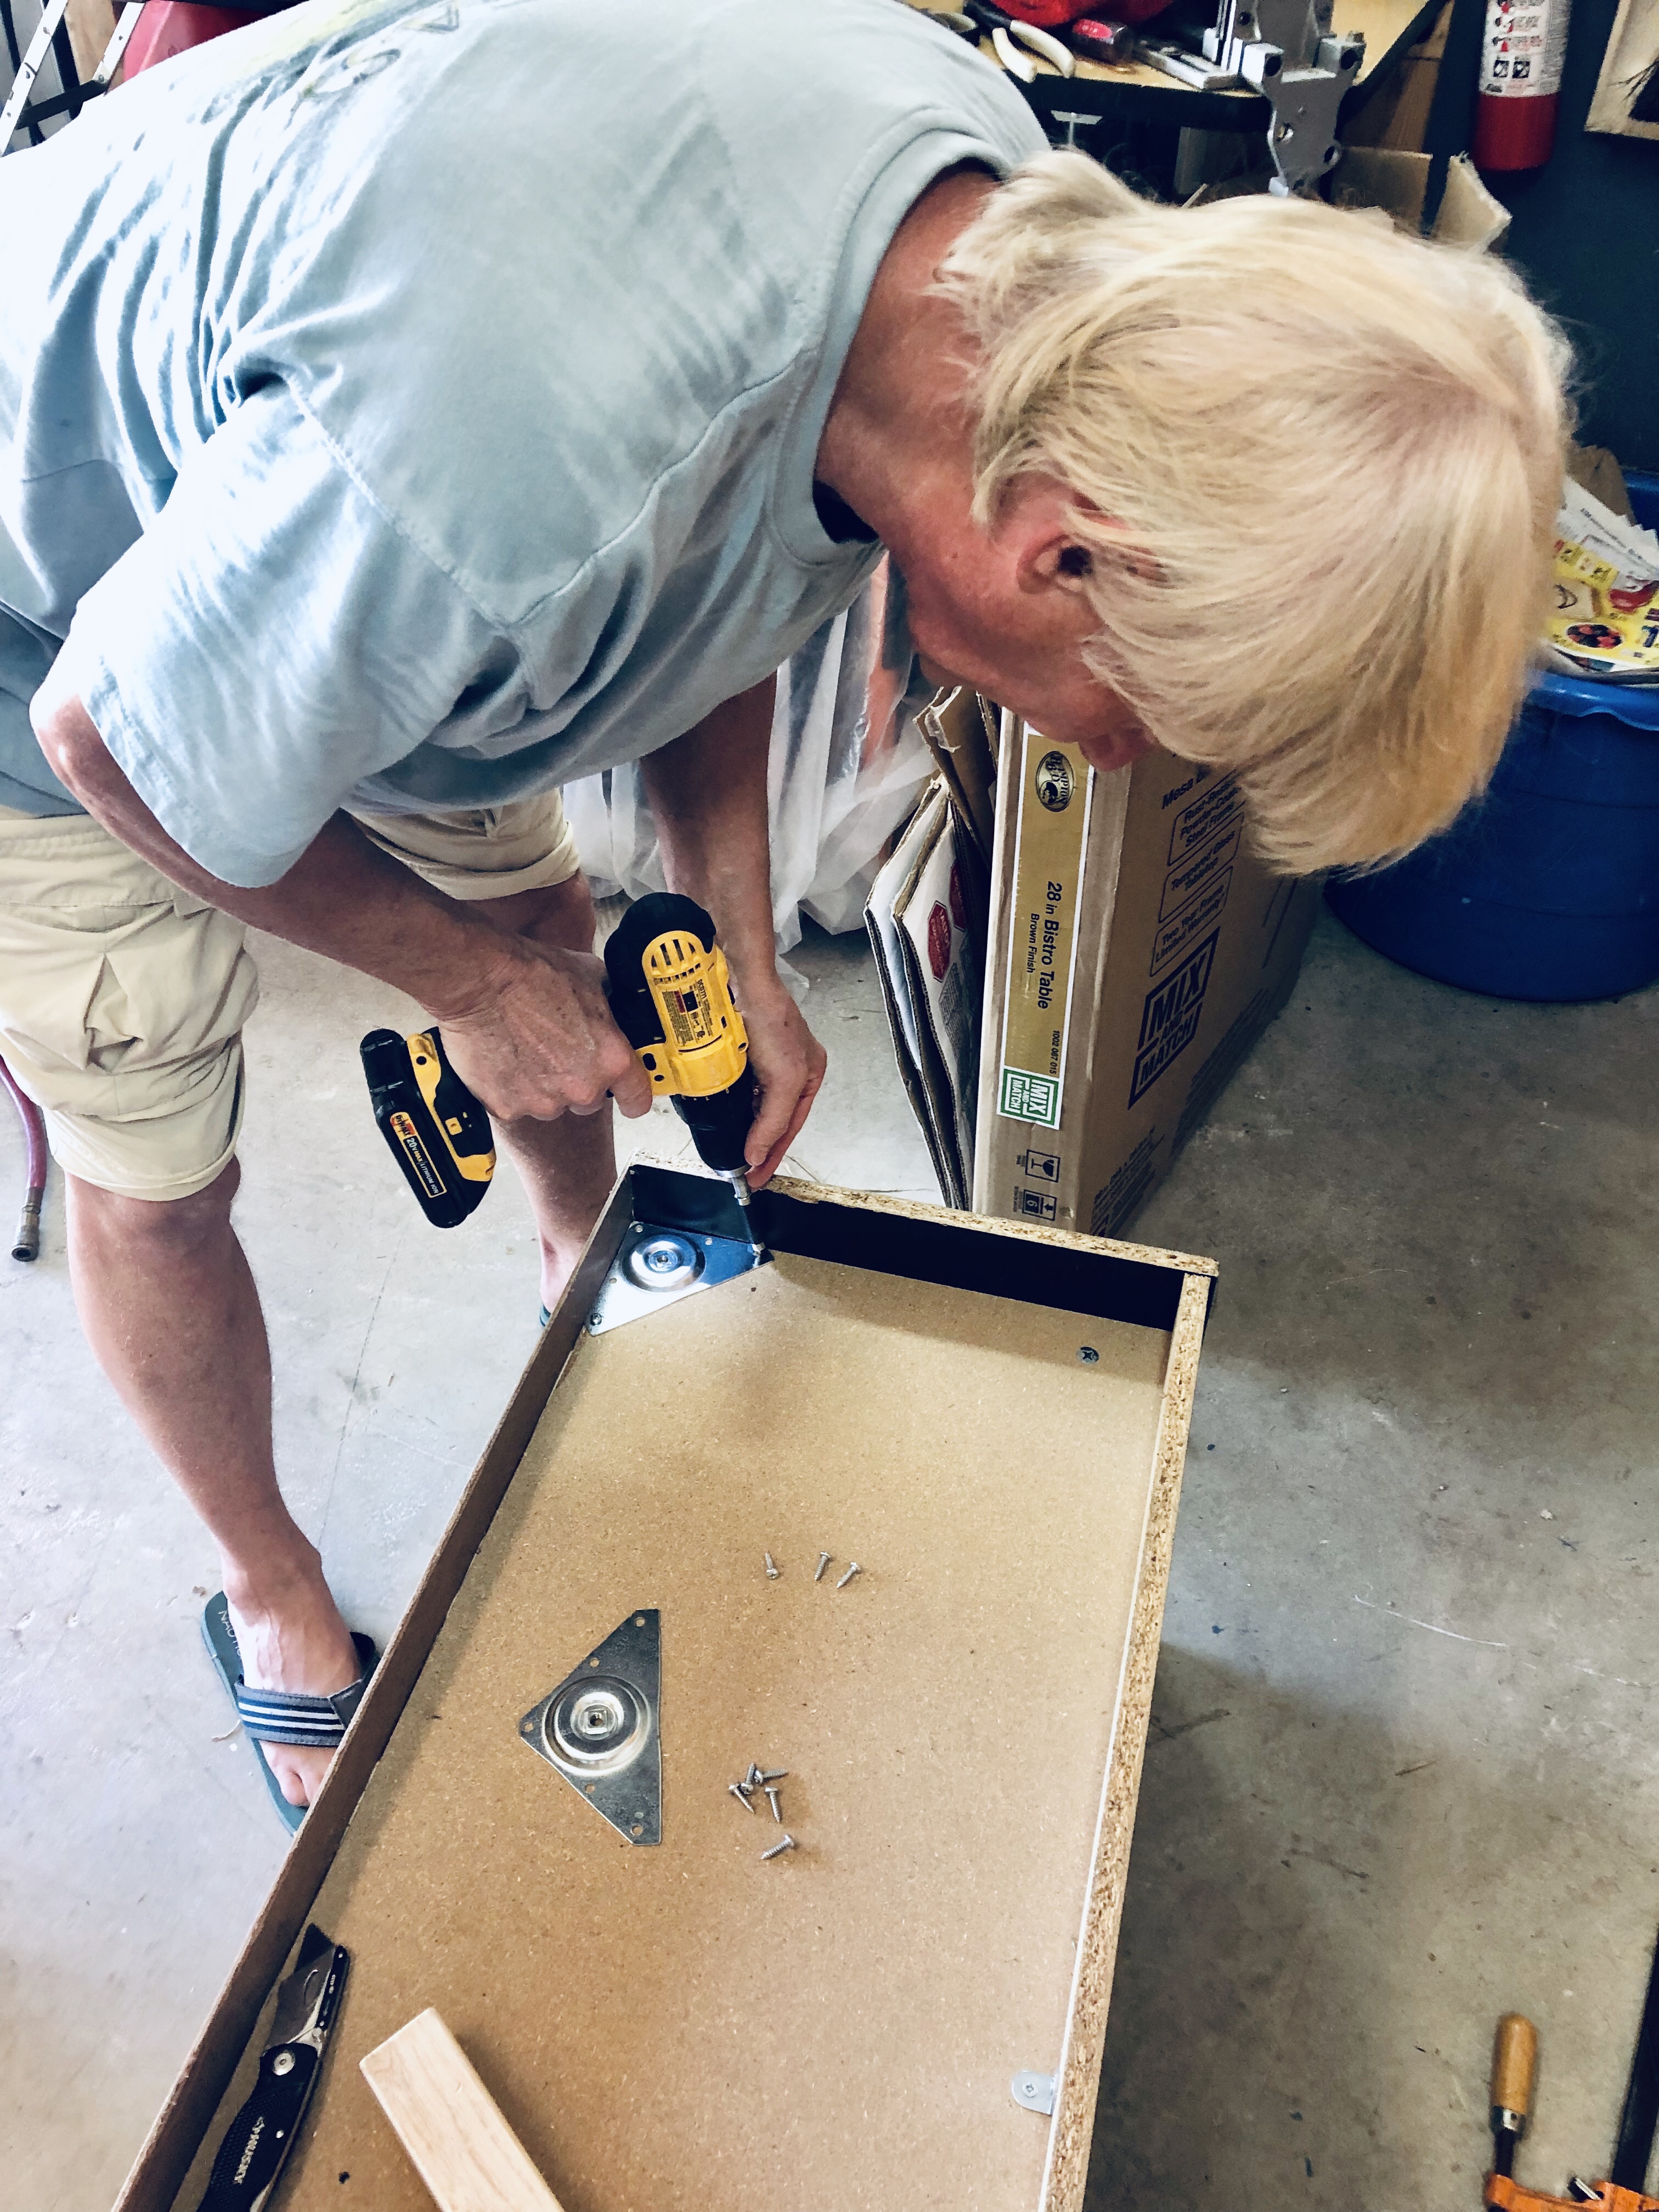
We used corner top plates and squared 6 inch legs for this piece.
Originally I was planning to use rounded dowels and have them angled to really capture the mid-century look, but they didn’t have the angled plates at the store and my other cabinet in the same room has straight, square legs so this will match better.
Before attaching the plates, we had to screw in a leg and allow it to twist to ensure it didn’t catch on the sides of the cabinet since the base is recessed by a few inches.
We then drilled each plate into the corner, which allows the legs to be screwed into the plate rather than the cabinet. This is great for moving the piece as the legs can easily be taken on and off.
Step Three: Create A Door

We bought a piece of tempered hardboard to cut down to create a door in the large opening.
One thing I’d really liked about the cabinets I’d seen on Amazon was the door feature that would allow me to hide some components such as my WiFi router.
We had to measure the door, cut and sand the edges and affix hinges to it. We then had to attach the handle and a magnetic stopper so the door would sit flush to the face of the cabinet.
This was the most complicated part of the project and I can confidently say I have no idea how my dad got the hinges to work the right way, but he did.
Step Four: Create Holes For Cables

We added in a hole for each of the three openings on this cabinet making it a more official TV stand.
This was done using one of those fancy door knob cutting devices. It’s called a hole saw.
To best create the hole, you drill about halfway from each direction making a clean cut and then sand down the opening once it’s done.
Step Five: Assemble

Marking the end of the DIY collaboration with my dad, we got the cabinet assembled and ready to be brought back to my apartment.
Step Six: Take It Apart and Paint


Thankfully it wasn’t too hot so I was able to paint on my patio when I got the cabinet home.
The ceiling repair guy was nice enough to leave me a can of quick dry spray paint so I used that to do a few coats on the door. I didn’t want a glossy/flat door so I used a paint brush to add in wood like texture. This took about 4 coats.
Painting tip: oil based paint will not come off a paintbrush with water, you need turpentine.
I used some leftover black paint from my bedroom to finish the legs. It took about two coats to cover the wood without using a primer.
Final Results:
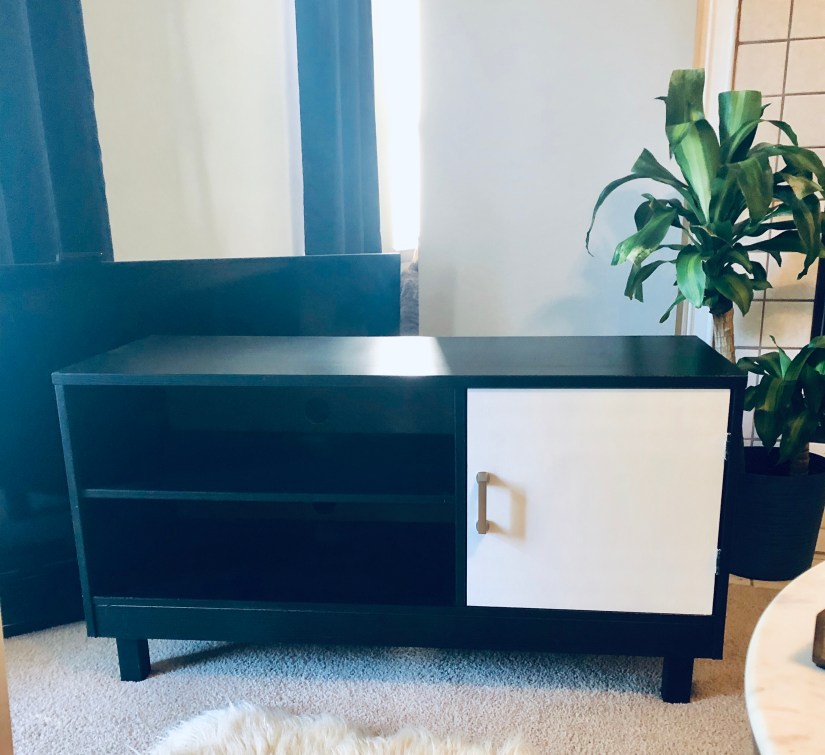
The final product came out amazing! It fits perfectly into my space and looks much nicer than any of the pieces I’d picked out on Amazon.
Total project came out to be just under $50.
A.
Wondering what’s coming in the future for blogging/design? Stay on the look out for a design related addition to My Life My Migraine!
